A poorly planned ADU bathroom plumbing layout can turn a dream project into a costly headache. Smart design choices, from wet-wall plumbing strategies to fixture placement, make the difference between effortless functionality and expensive rework. As California’s 2025 ADU plumbing code updates roll out, understanding how each decision affects budget, compliance, and efficiency is more crucial than ever for homeowners building or renovating an accessory dwelling unit.
This guide breaks down the essentials of efficient ADU bathroom plumbing planning with practical insights that save time, space, and money. Up next, you’ll learn the key strategies that simplify installation, ensure plumbing code compliance, and help bring your small-space bathroom layout for accessory dwelling units to life without unexpected setbacks.
Key Takeaways
- Align all fixtures on a single wet wall to minimize pipe runs, simplify inspections, and lower labor costs in your **ADU bathroom plumbing layout**.
- Locate the bathroom near existing water and sewer tie-ins to cut trenching distance and keep rough-in costs predictable.
- Plan the drain-waste-vent (DWV) design before framing to ensure proper slope, venting, and long-term code compliance.
- Choose compact, WaterSense-labeled fixtures like corner sinks or wall-hung toilets to save space without compromising comfort.
- Design for California’s 2025 plumbing code updates by including efficient fixtures and required backflow prevention to avoid inspection delays.
- Partner with a licensed **Sacramento plumber** who understands **local ADU permit processes** to prevent costly rework and keep your project on schedule.
How to Plan an Efficient ADU Bathroom Plumbing Layout
An efficient ADU bathroom plumbing layout starts with a simple rule: plan plumbing first, finishes later. Early ADU plumbing layout planning lets you align fixtures on shared wet walls, shorten pipe runs, and avoid costly reroutes during rough-in. In tight Sacramento accessory dwelling unit footprints, one thoughtful bathroom layout for accessory dwelling unit spaces can reduce trenching, simplify inspections, and keep your budget on track. Align the toilet, shower, and lav on a single wet wall where possible, and place the bathroom near the ADU’s shortest path to the main sewer and water. For budget context and permitting prep, review ADU plumbing cost and code requirements to set expectations early.
Key planning goals:
- Stack fixtures on one wet wall
- Keep runs short to water and sewer tie-ins
- Size vents and drains correctly from day one
- Choose compact fixtures that protect comfort
- Plan for Sacramento inspections and ADU code compliance
Smart Start: Designing Your ADU Bathroom Layout Around Efficiency
In Sacramento, the most successful accessory dwelling bathroom design decisions start with plumbing locations, not tile patterns. Once you place your wet wall and understand where you can tie into existing lines, the rest of your ADU plumbing layout planning falls into place. Think in terms of a movement multiplier: every additional foot you move drains or supplies in a small ADU compounds costs across framing, concrete, trenching, labor, and change orders. A simple wet-wall plumbing design can reduce those multipliers significantly.
Poor vs. efficient alignments:
- Poor: Toilet on one wall, shower across the room, vanity on a third wall
- Efficient: Toilet, shower, and vanity sharing a single wet wall
- Poor: Bathroom far from sewer tie-in
- Efficient: Bathroom located closest to existing tie-in path
Why Plumbing Layout Should Come Before Anything Else
If you’re asking how to plan plumbing layout for ADU bathroom spaces, start by placing your wet wall, then design the room around it. That sequence optimizes your ADU bathroom floor plan for code compliance, inspection access, and trade efficiency. Moving fixtures after framing can trigger rework across multiple trades and delay inspections. On compact lots in the Sacramento ADU area, trenching to new tie-ins or rerouting lines around mature trees can drive unexpected costs. Finalize fixture alignment, DWV routing, and vent terminations on paper before submitting permits. That clarity shortens rough-in time, helps your inspector follow the design intent, and reduces surprises when you open floors or trench to reach existing utilities.
The Wet-Wall Strategy That Saves Time and Money
Wet-wall plumbing design means placing your toilet, shower, and sink on the same wall so supply, drain, and vent lines share a compact plumbing chase. For an ADU bathroom plumbing layout, a single wet wall reduces the number of elbows, pipe runs, and penetrations. In practice, that can mean fewer slab cuts in garage conversions, less trenching in detached backyard ADUs, and shorter vent runs to the roof. The strategy scales: in a studio layout, back the kitchen sink up to the bathroom wet wall for maximum consolidation. In Sacramento’s older neighborhoods with narrow side yards, consolidation also speeds inspection because everything is visible and traceable in one zone, limiting callbacks and costly change orders.
Designing Backward: How to Align with Existing Water and Sewer Lines
Design your ADU bathroom plumbing layout by working backward from existing water supply line ADU tie-in points and sewer line connection ADU locations. Start by locating your water supply line at the shortest, code-compliant route. Then, site the bathroom to minimize the distance to your ADU sewer line connection. Visually map these paths on a scaled plan: mark trench routes, slab areas to cut, and any obstacles like trees or utilities. Place the wet wall on the side closest to the main lines to shorten pipe runs and vent paths. In Sacramento, that often means placing the ADU bath toward the backyard side where existing cleanouts or main lines are accessible. This approach reduces excavation, preserves landscaping, and streamlines permitting review.
Pinpointing Your Utility Tie-Ins Early
Pinpointing tie-ins before floor plans harden keeps trenching short and predictable. Identify the water main entry point and sewer cleanout location at the main house, then measure the most direct path to your ADU. Minimizing length reduces material, labor, and restoration costs. If you can place your ADU bathroom on the same side as these utilities, you’ll often save time and money during rough-in and inspection. For homeowners asking if an ADU can share plumbing with the main house, early mapping reveals whether a shared route is feasible and code-compliant. When in doubt, photograph and flag your proposed routes so your designer, plumber, and Sacramento building official can validate feasibility before you submit permits.
Can Your ADU Share Plumbing With the Main House?
In many cases, yes. Under California law, jurisdictions may allow ADUs within existing structures to avoid new or separate utility connections while permitting a new connection and capacity fees for detached ADUs. Review the exact language in the California Government Code to understand when separate connections or fees apply to your project. Sacramento adopts state standards and adds local permitting steps, so confirm details during your pre-application meeting. When planning shared systems, confirm pipe sizes, slopes, cleanout placement, and backflow protection to satisfy both state and local provisions and avoid mid-project revisions.
Fitting It All In: Space-Saving Fixture Ideas That Actually Work
Smart fixture selection preserves comfort without using unnecessary square footage in a small ADU bathroom floor plan. Use 24-inch to 30-inch vanities, compact elongated toilets with 12-inch rough-ins, and 36-inch neo-angle or curbless showers to keep clearances comfortable. Wall-hung vanities and toilets free up floor space for easier cleaning and a larger visual footprint. When refining fixture placement decisions, remember consolidation: position the shower valve, lav, and toilet on the same wet wall to reduce rough-in time. Consider WaterSense fixtures to lower water bills and meet rebate criteria. Pair compact layouts with bright lighting and a large mirror to expand perceived space without moving walls.
Budget vs. Efficiency vs. Space-Saving Fixtures:
| Fixture Type | Budget | Efficiency | Space Saving | Notes |
|---|---|---|---|---|
| Standard 1.28 gpf toilet | $ | High | Medium | Reliable, easy rough-in |
| Compact elongated toilet | $$ | High | High | Shorter projection saves inches |
| 36-inch shower kit | $ | Medium | Medium | Easiest install, fewer parts |
| Neo-angle shower | $$ | Medium | High | Frees floor area in corners |
| Wall-hung vanity | $$ | Medium | High | Opens floor, good in studios |
The Unsung Hero: Planning Drain, Waste, and Vent Before It’s Too Late
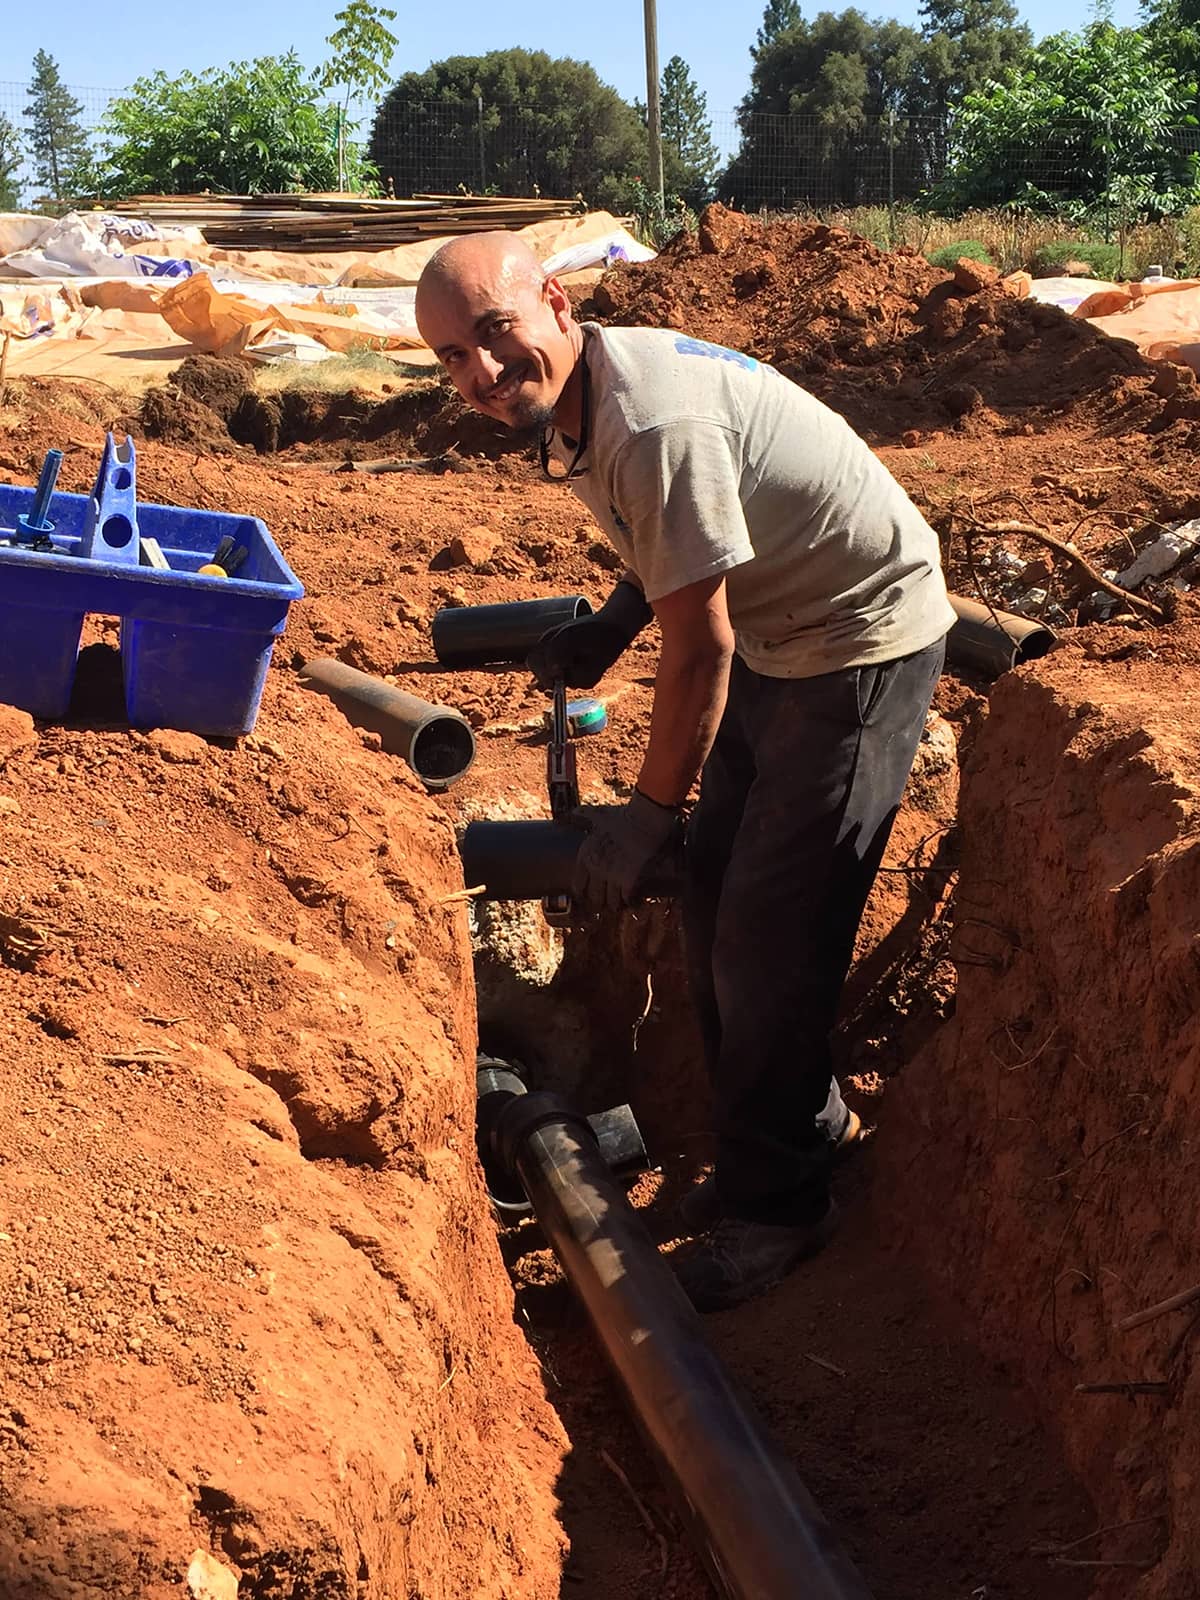
A great ADU bathroom plumbing layout depends on a well-planned drain-waste-vent system ADU design. The DWV configuration determines how fast fixtures clear, how quiet the system runs, and whether traps keep sewer gas out. Plan slope, vent distances, and cleanout locations before you frame. Factor wall depth for vent stacks on the wet wall and coordinate roof penetrations with your designer to avoid last-minute reroutes. Remember that ADU plumbing rough-in inspections focus on slope, support, trap protection, and vent continuity. Ignoring DWV early often leads to noise, slow drains, or inspection corrections later. If your layout is tight, consider an in-wall carrier system that doubles as a vent chase to free inches without sacrificing code compliance.
Getting Your DWV System Right the First Time
Two fundamentals keep DWV trouble-free: maintain minimum drain slope and protect trap seals with proper venting. Model codes require horizontal drainage piping to run at a uniform slope, commonly 1/4 inch per foot for small-diameter lines, and they require traps and trap arms to be vented to prevent siphonage. Size vents based on fixture units, keep vent takeoffs within allowed distances, and avoid flat venting. Plan cleanouts where changes of direction occur and where inspectors can easily access them. Verify slope, vent path, and cleanout locations on your DWV isometric before rough-in. Doing so protects your budget and avoids multiple inspection trips.
See plumbing code fundamentals on sanitary drainage and venting
Common DWV Mistakes to Avoid
Avoid these five pitfalls that derail ADU bathroom plumbing rough-ins:
1) Under-slope on long horizontal runs causing chronic clogs
2) Over-slope near fixture arms leaving solids behind
3) Vent takeoffs too far from traps risking siphonage
4) Hidden or inaccessible cleanouts complicating maintenance
5) Oversized or undersized vents and drains failing inspection
When the distance to the main sewer is significant, consider re-siting the bathroom or adding an intermediate cleanout for maintenance. For tight ADU bathroom plumbing layout constraints, use the wet wall as your vent and drain backbone to reduce fittings and noise. Always water-test or air-test the system before calling for inspection.
Staying Ahead of California’s 2025 Plumbing Code Changes
California’s next code cycle emphasizes water efficiency, leak reduction, and better backflow prevention ADU requirements. For ADUs in Sacramento, expect scrutiny on backflow prevention details at the water service, low-flow fixtures that meet labeling standards, and proper documentation during plumbing permits ADU Sacramento submission. Plan for inspection scheduling early; Sacramento’s inspectors will verify rough-in, top-out, and final, and workloads can extend timelines during peak building seasons. Keep submittals clean, include DWV isometrics, and note any engineered alternatives. If your project may span calendar years, design to the stricter standard to prevent mid-project redesigns. For ongoing local timing expectations, reference the city’s inspection information and coordinate with your contractor during preconstruction.
Expert Corner: Water Heating Solutions That Save Space and Energy
Your water heater strategy affects both plumbing efficiency and usable space. A small electric or gas tankless near the bath minimizes hot-water wait time and shortens pipe runs. For some layouts, a shared system versus tankless decision hinges on distance: if the main house heater is far, the ADU wastes water and energy with every draw. Tankless models avoid standby heat loss and deliver hot water on demand; placing the heater close to fixtures reduces distribution losses and water waste. Plan venting, gas sizing, or electrical capacity early if you choose tankless. If you must share, consider a recirculation strategy designed for short, well-insulated runs.
Bringing It All Together: Your Step-by-Step ADU Bathroom Plumbing Plan
Use this 5-stage checklist to turn concepts into action:
Step-by-Step Preconstruction Planning
- Stage 1: Site and Utility Mapping
- Locate water and sewer tie-ins; sketch the shortest feasible routes.
- Stage 2: Wet-Wall and Fixture Layout
- Stack toilet, shower, and lav on one wall; confirm clearances.
- Stage 3: DWV Isometric and Rough-In Specs
- Mark pipe sizes, slopes, vent paths, and cleanouts.
- Stage 4: Permitting Package
- Include plans, specs, product sheets, and Sacramento forms.
- Stage 5: Build Sequence
- Rough-in pressure and DWV test, inspection, top-out, final trim.
Integrate this plan with your ADU bathroom floor plan drawings so all trades price the same scope and inspectors can easily verify code compliance.
Budget Reality Check: How to Keep Plumbing Costs Under Control
Think in multipliers: in an ADU, each extra foot of pipe, trench, or slab cut increases cost across multiple tasks. Keep the bath close to tie-ins, use a consolidated wet wall, and choose fixtures that install cleanly. Sacramento pricing varies with soil conditions, distance, and access, but you can control key cost drivers with thoughtful design. Save by reducing trench length, limiting concrete demo, and avoiding post-framing reroutes. Build a contingency for hidden conditions like root intrusions or shallow existing drains. Ask your plumber for alternates, for example, a compact shower kit versus tile to offset a needed cleanout relocation.
Cost Breakdown by Category – Sacramento Averages
| Category | Typical Range | Cost Driver |
|---|---|---|
| Trenching and backfill | Moderate to high | Distance to tie-ins, obstacles |
| Concrete demo and patch | Moderate | Slab cuts for bath rough-ins |
| DWV materials and labor | Moderate | Pipe sizes, number of fittings |
| Water supply and valves | Low to moderate | Line length, shutoff strategy |
| Fixtures and trim | Low to high | Brand, style, WaterSense ratings |
| Water heater and venting | Moderate | Tankless vs. shared, utilities |
What Could Go Wrong: Common ADU Plumbing Pitfalls to Avoid
Avoid these common ADU bathroom plumbing mistakes to prevent delays and rework:
- Designing finishes first, then forcing plumbing to fit
- Splitting fixtures across multiple walls in a tiny bath
- Ignoring DWV slope and vent distances until inspection day
- Underestimating trenching distance to tie-ins
- Skipping water heater location planning leading to long hot-water waits
Quick fixes:
- Redraw around a single wet wall
- Re-site the bathroom closer to tie-ins
- Confirm vent takeoffs and cleanouts on the isometric
- Choose compact fixtures to recover inches
- Place the water heater near points of use
This practical approach keeps your ADU bathroom plumbing layout compliant, buildable, and budget-friendly.
Pro-Level Insight: Why Working with a Licensed Sacramento Plumber Matters
A licensed plumber Sacramento provider protects your budget, permits, and inspection timeline. California requires a contractor’s license for construction work of $500 or more, and plumbing is performed under the C-36 classification. That credential signals code fluency, testing know-how, and responsibility for workmanship. In practice, pros anticipate DWV conflicts, right-size vents, and position cleanouts where Sacramento inspectors expect them. They also coordinate electric or gas upgrades for tankless heaters and help you navigate rebates and submittals. When issues surface, a seasoned team can redesign on the spot without risking compliance. Ask for recent ADU case examples, permit numbers, and final inspection dates to confirm experience before you sign.
The Bottom Line: Plan Smart, Build Right, Save Money
A thoughtful ADU bathroom plumbing layout pays you back at every step: shorter runs, cleaner inspections, fewer change orders, and better comfort in small accessory dwelling spaces. Lead with wet-wall consolidation, design backward from tie-ins, and plan the DWV before you frame. Choose fixtures that fit your footprint, place the water heater close to use, and budget with realistic Sacramento assumptions. With a solid plan and a licensed team, your accessory dwelling bathroom design will be efficient, code-compliant, and tenant-pleasing from day one. Use this guide to finalize drawings, price accurately, and move through permits with confidence so your ADU is on schedule and on budget.
Building Confidence from the Ground Up
Every successful ADU project in Sacramento starts beneath the surface with a plumbing layout built on foresight and precision. Getting your ADU bathroom plumbing layout right early sets the tone for everything that follows: faster permits, fewer mid-construction surprises, and smoother inspections. By designing around the wet wall, aligning with existing tie-ins, and planning your DWV system before framing, you protect both your investment and peace of mind. Sacramento Plumbing Solutions brings the experience to translate these principles into practical results that meet local codes and your budget goals. Whether you’re building for family, rental income, or long-term flexibility, your best returns begin with sound plumbing design. Take the next step toward a layout that saves time, money, and future headaches by planning smart, building confidently, and letting expert design make your ADU flow seamlessly from the start.